Managing assets
This page covers the operations that change assets on disk, and the processors that change many at once. Everything here is refused while the window is paused for Play Mode; see While the editor is playing.
Where an action lives
Create is the + button in the object list header; it always acts on the selected type.
Clone, Rename, Move, and Delete are the four buttons on the right of each object row, and they act on that row's object without selecting it first.
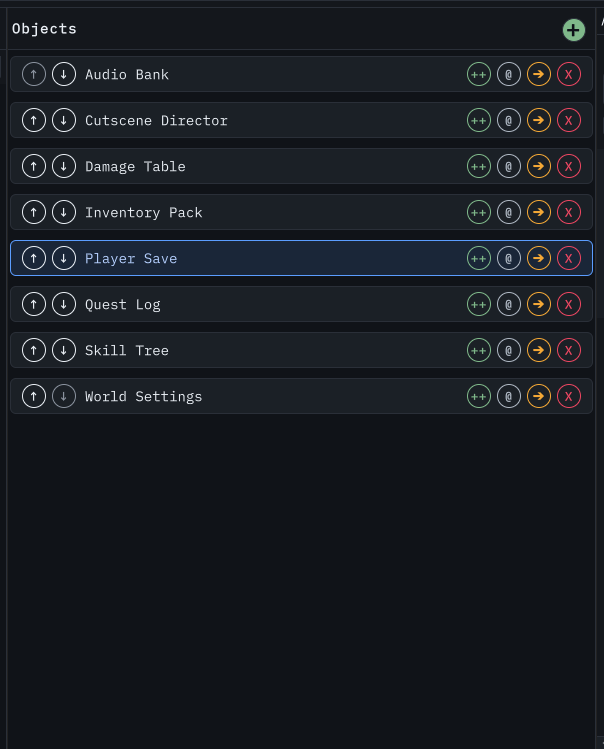 Per-row asset management controls. Regenerated from the live window by
the docs capture pipeline.
Per-row asset management controls. Regenerated from the live window by
the docs capture pipeline.
Create
Create asks for a name, prefilled with the type's display name, and refuses a blank name or one containing a character that is invalid in a file name.
The asset is written to a per-type folder under your Data Folder, using the type's full name with each . replaced by a directory separator. For MyGame.Items.WeaponData with
a Data Folder of Assets/Data, the asset lands in Assets/Data/MyGame/Items/WeaponData/. Those folders are created for you.
If the name is already taken, nothing is written. When the existing asset is the same type it is selected and shown, and the dialog says so.
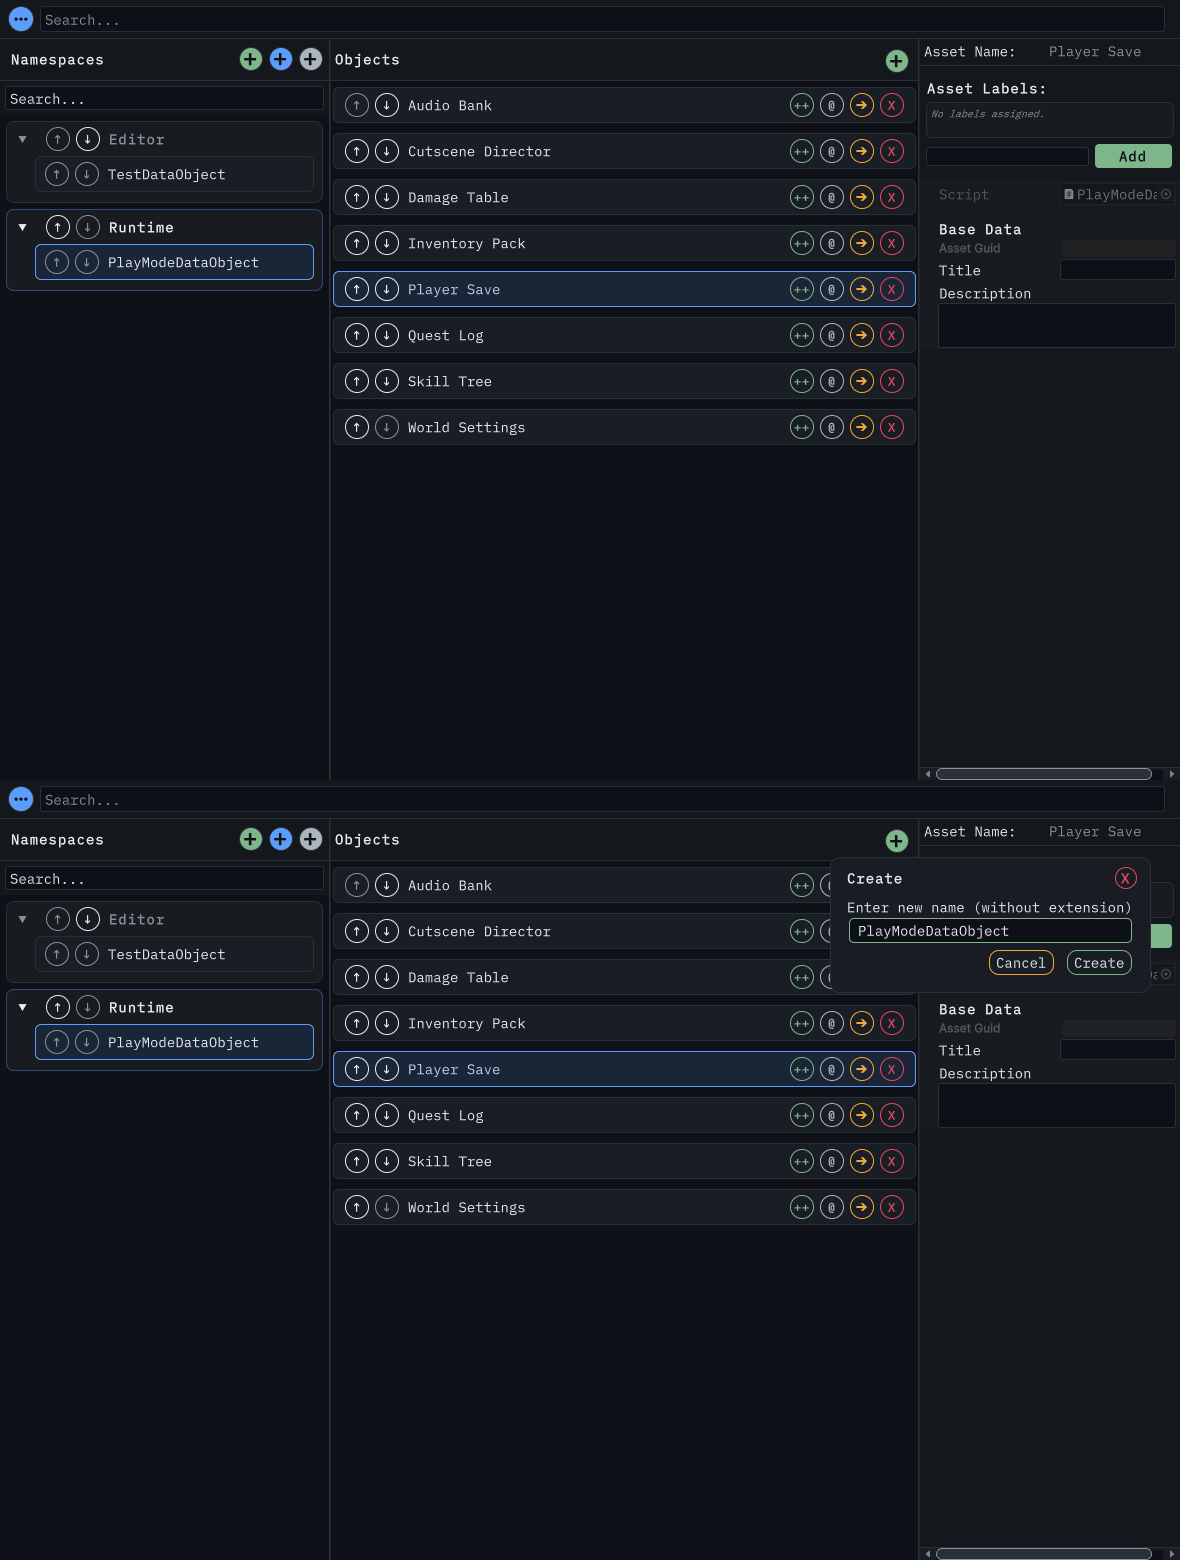 The animation alternates between the window and its Create
controls; it does not create an asset. Static view.
The animation alternates between the window and its Create
controls; it does not create an asset. Static view.

Clone
Clone copies the selected asset into the same folder as the original, and inserts the copy directly after the original in the list, then selects it.
Naming strips any existing (Clone) or (Clone n) from the source file name first, so repeated clones do not accumulate suffixes. The first clone is (Clone), then (Clone 1),
(Clone 2), and so on. Unity's own unique-path check breaks any remaining collision.
Clones always stay beside their original. Your Data Folder does not affect them.
Rename
Rename asks for a new name without the extension and validates it before touching the asset. The dialog reports Invalid name. for a blank name or an invalid character,
Name is unchanged. when nothing differs, and Unity's own Invalid: … message when the move would be rejected, for example onto an existing file.
The asset keeps its folder; only the file name changes.
Move
Move opens a folder picker starting in the asset's current folder. The target must be inside the project's Assets directory; anything else is refused with an Invalid
Folder dialog. Moving an asset to the folder it is already in does nothing.
The asset keeps its file name.
Delete
Delete asks for confirmation, naming the asset. Confirming removes the .asset file. Cancel does nothing.
Processors
The Processors area sits below the namespace panel. It lists every IDataProcessor implementation in your project whose Accepts list covers the selected type, sorted by
name. A processor with no Accepts list is never offered. The collapsed header shows how many processors are listed; the area is hidden entirely when none apply.
Clicking a processor opens a confirmation that names the processor and the number of objects it will receive. Confirming runs Process, saves assets, refreshes the AssetDatabase,
and schedules a window refresh. A processor that throws is caught: the exception is logged and an Error running processor '…' dialog reports the message. Other processors are
unaffected.
ALL and FILTERED
The ALL / FILTERED switch above the processor list sets the scope.
- ALL passes every loaded instance of the selected type.
- FILTERED passes only the instances the label filter currently shows. With no label filter, that is the same set as ALL.
FILTERED is the default.
Refusal while loading
Instances stream in asynchronously. Running a processor while the selected type is still loading would touch only the subset that has arrived while the dialog implied the whole type, so the run is refused with a Loading In Progress dialog. Wait for the load to finish, then run it.
Processors are also refused during the Play Mode pause, and the switch is disabled while the window is paused.
Undo
These operations are not on Unity's undo stack. Clone, rename, move, and delete change files directly. Inspector edits go through Unity's own serialized-object path and do support undo.
Next steps
- Search and filtering — find objects and narrow them by label.
- Organizing your data — ordering, layout, persistence, and the Play Mode pause.
- Extending the window — write your own processors.